
This is a small article about some cool dev tools and console tricks. Most of you are probably familiar with many of this features, but I hope that you just explore one or two little nuggets from this post.
DOM change breakpoint
DOM Breakpoints are useful to break on DOM mutation events, such as when a node is removed, modified, or its attributes are changed. There are particularly useful when you've some JavaScript running on the page but you don't know what is causing/changing it.
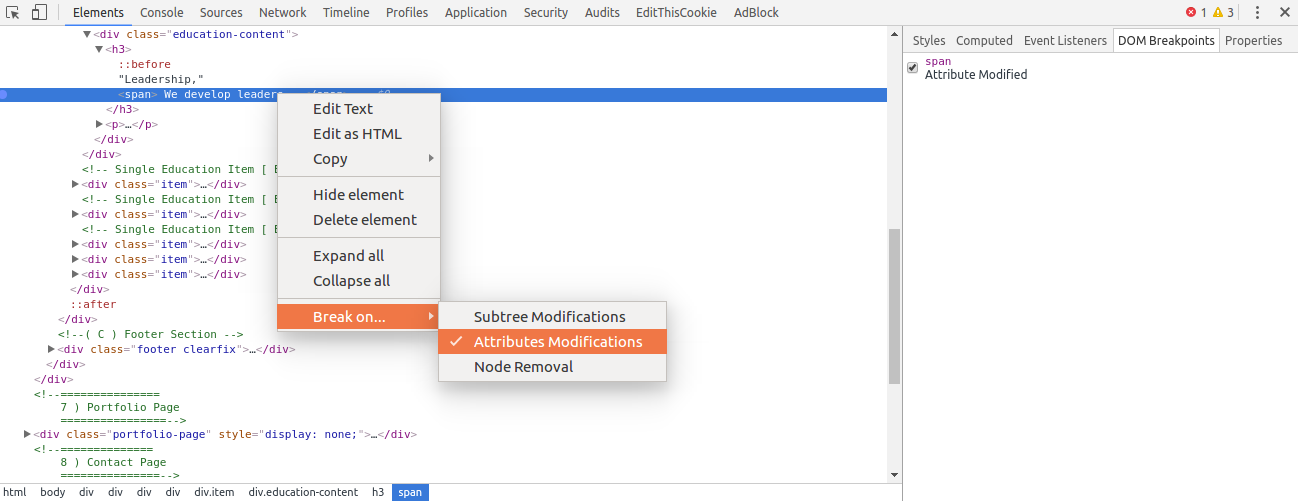
Now, It's going to pop a debugger command in, which is a break point that will show you the line of code that is causing that attribute.
Pretty print {}
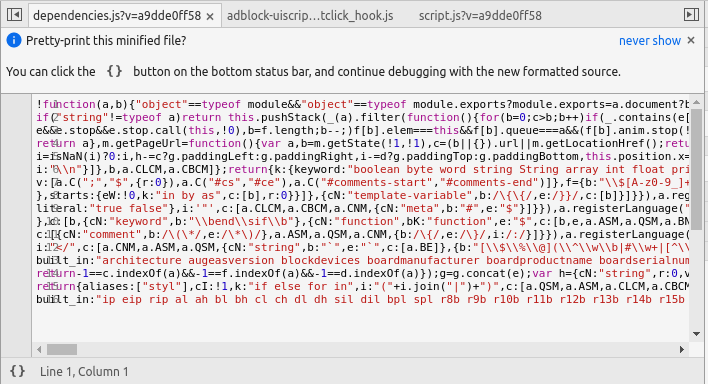
This feature is particularly handy if you need to step through your minified js file or a minified library served from a remote site. What you've to do? just click on the minification button {} to get a much more nicely formatted version of the file.
Selecting elements in console
There are also some handy magic variables and functions for selecting DOM elements:
- $() – Short for document.querySelector(): Returns the first element, matching a CSS selector
- $$() – Short for document.querySelectorAll(): Returns an array of elements that match the given CSS selector.
- $0 – $4: A history of the five most recent DOM elements that you’ve selected in the elements panel, $0 being the latest.

Go to line
After you’ve opened a file in the Sources tab, dev tools allows you to easily jump to any line in it. To do so press Ctrl + G for chrome and Ctrl + L for Firefox, and type in your line number.

Console.log()
You probably know about console.log, which is obviously the easiest way to log data in console. You can pass as many arguments as you want and they will be joined together in a row.
console.log(2,4,6,8,"toto", fero)
String Substitution
console.log can also format strings in the great tradition of printf in C. For example, you can write:
console.log("%s is %d years old.", "Hero", 42).
Lately, I don't use it all that much anymore now that we have ES6 back-ticks, I much prefer to do:
var name = "Fero";
console.log(`Yo, ${name}!`);
Styling
We can also style our text using %c, so you can apply any CSS property to your text:
console.log('%c Oh, this is some styled text', 'color: green; font-size:50px')
console.assert()
You can use console.assert to check if things are true. So if you run
console.assert(100 === 100, 'This is sooo wrong')
you don't see anything! Why ? Because that is true. Console.assert will only fire if something is wrong.

console.clear()
This will simply clear the console. This is funnily useful if you really want to mess with a developer you could just put that at the bottom of your javascript file :D you got it, that's really frustrating.
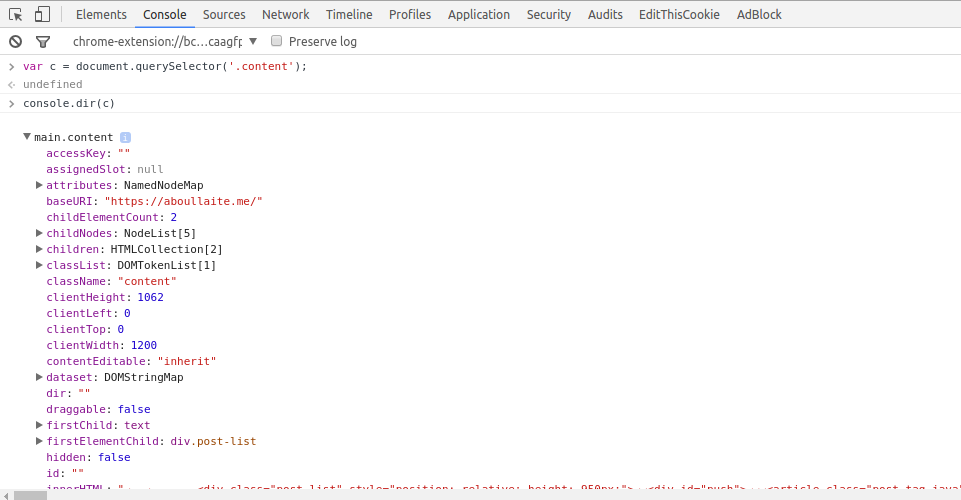
console.dir()
This allows you to view the properties of a DOM element. The output is presented as a hierarchical listing with disclosure triangles that let you see the contents of child objects. Basically console.log will show you all of the stuff that lives on that element, whereas "console.log" is going to show you the actual element itself.
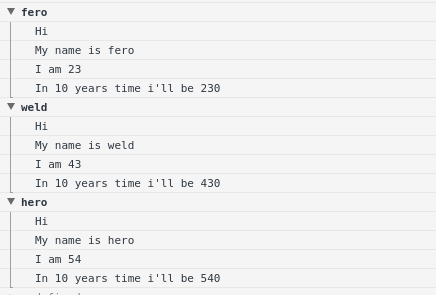
console.group()
As long as you're logging only a small amount of messages to the console, your log is likely to be readable enough. With a growing number of logging statements, however, things get messy quickly, especially if you're logging raw values without aptly named labels.
You can group related log statements by surrounding them with the console.group() and console.groupEnd() functions:
const men = [{name: 'fero', age: 23},{ name:'weld', age: 43}, {name: 'hero', age:54}]
men.forEach(m => {
console.group(`${m.name}`);
console.log(`Hi`);
console.log(`My name is ${m.name}`);
console.log(`I am ${m.age}`);
console.log(`In 10 years time i'll be ${m.age *10}`);
console.groupEnd(`${m.name}`);
});
The output is much nicer:
You can also use Console.groupCollapsed(), but unlike Console.group() the new group is created collapsed.
console.table()
My favorite one so far. It takes an array of objects, and assuming that they all have the same properties, it will display them in a nice table for you,

console.warn(), .error(), .info()
console.warn()
This will output a warning message to the Web Console.

console.info()
You can use console.info() to output information messages.

You've certainly noted the small displayed "i" icon. I like it ;)
console.error()
Well, you've guessed it! It outputs an error message to the Web Console.

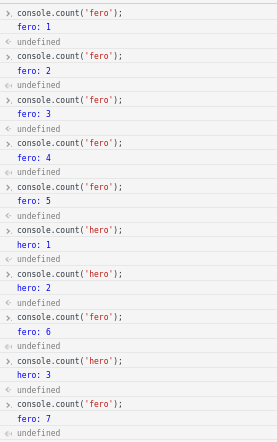
console.count()
This will count how many times you use a specific word, number, object, DOM node, or
anything that you have.
console.timing()
If you want to see how long something takes, what you can do is start a timer. for example let's see how much time takes fetching some data from github:
console.time('fetch github data')
fetch('https://api.github.com/users/aboullaite')
.then(data => data.json())
.then(data => {
   console.timeEnd('fetch github data');
   console.log(data)
});
# Output
 fetch github data: 280080.281ms
That's it. Hopefully you learned a thing or two ;)